Creating a quick card and tag
Share
Creating a quick card and tag.
Card making was the plan for a quick creative time. I needed to get into my studio to do something creative but had limited time so I decided to do a simple card and tag.
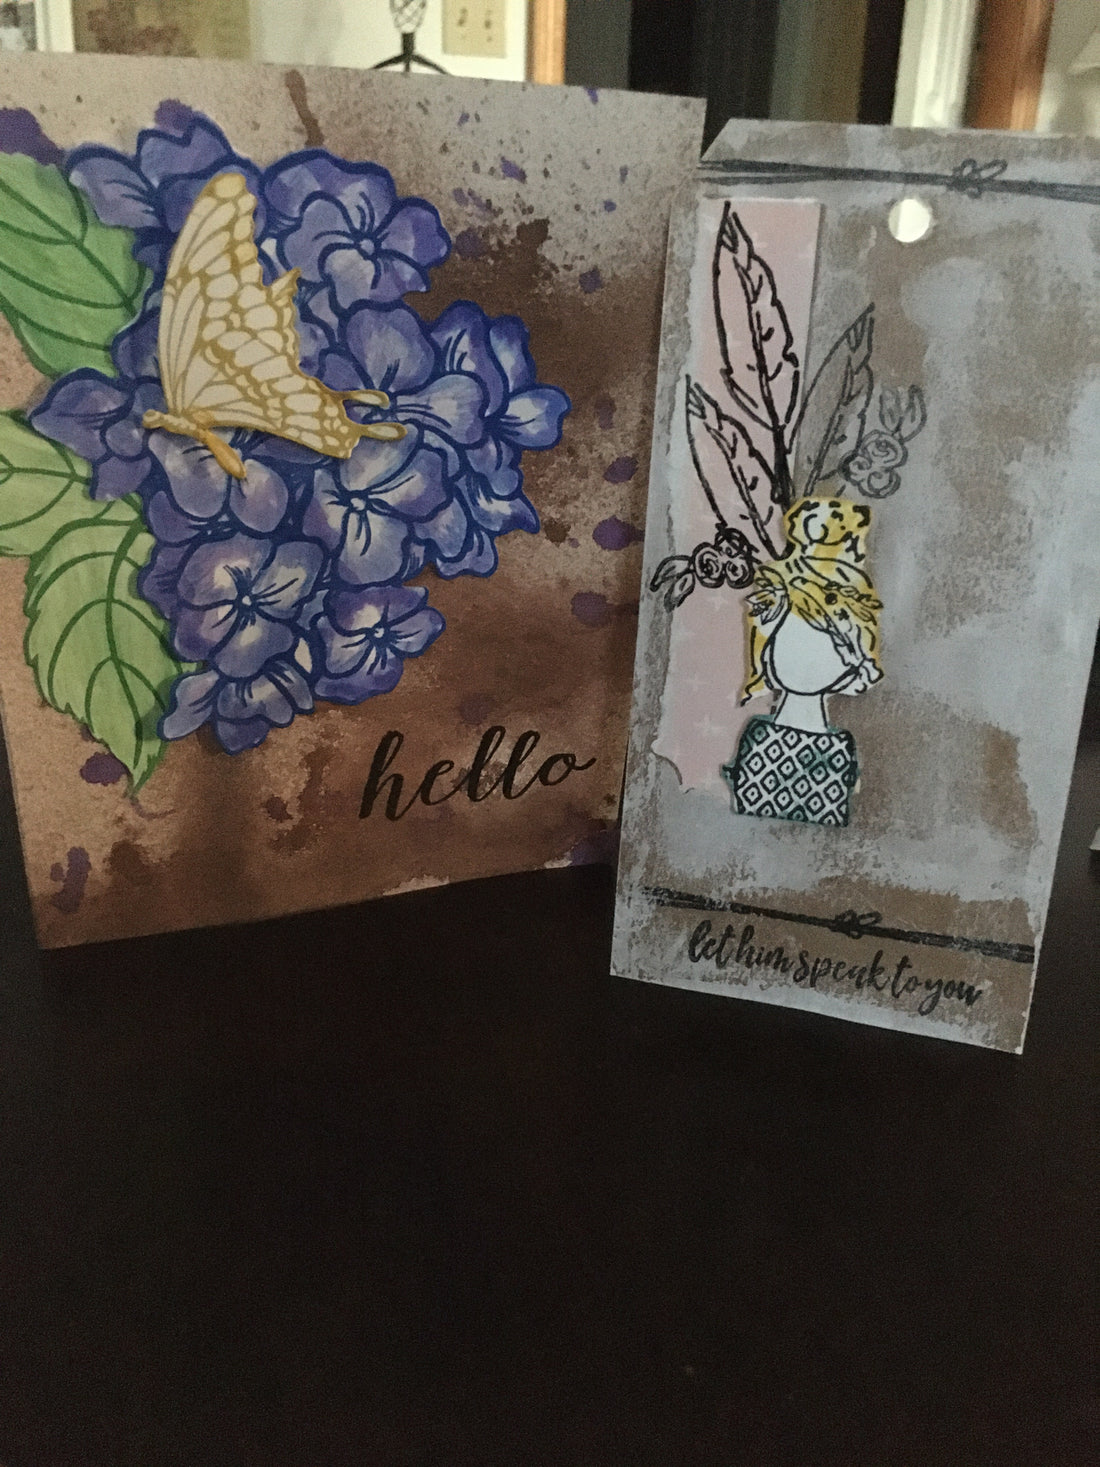
For the background, I used my very loved glimmer mist in coffee. I then used glimmer mist in violet to splatter a bit of color to pull from the florals.
For the floral, butterfly, and leaf images I stamped in black archival ink. I then passed it through my Sizzix die cutter using the magnetic plate. I love this magnetic plate. It helps so much withholding the dies down.
To add color I decided to use my color pencils. I hadn’t used them in so long and thought I would try to blend the shades to get a soft effect. After I colored the floral bloom in, I decided to add some glimmer mist in a violet shade to complete the look. It has a very pretty shimmer effect and blended the pencil coloring even more.
Once the pieces were dry I attached them to my card base. I raised the butterfly with a foam pop dot. Stamped the hello in black archival ink and it was done.
Very simple but beautiful card ready to send to a favorite person.
To create the tag I started with a pre-cut kraft colored tag. I next added a scrap piece of printed cardstock to add texture.
I then applied white
paint using my finger to lighten
the background. I love how this added so much interest to the background. From there I just simply used the feather stamp randomly and added the floral cluster too,
For the girl, I stamped and fussy
cut her out.
To add color, I just randomly tapped into my ink pads to give her hints of color. Finished off with a simple border stamped at the top and bottom. “Let him speak to you” was added in black ink. So simple but meaningful handmade tag to send to my sweet friend.
Please join my email list to get more crafting ideas, updates. I would love your company!
Kindly,
Carrie
