DIY Paper Clay - Crafting Clay Creations from Recycled Cartons & IOD Decor Moulds
Share
DIY Paper Clay - Crafting Clay Creations from Recycled Cartons & IOD Moulds
Water
Blender or food processor
Glue
Decor moulds - my go to favorite moulds are IOD - Iron Orchid Designs

Step 1: Gather Your Materials
Start by collecting used egg cartons. You'll be amazed at how quickly these can accumulate, and they're perfect for repurposing into paper clay.
Step 2: Prepare the Egg Cartons
Tear the egg cartons into small pieces and place them in a blender or food processor. Add water to cover the carton pieces and let them soak for about 30 minutes to soften.

Step 3: Blend Away
Once the carton pieces are softened, blend them in the blender or food processor until you achieve a smooth pulp-like consistency. Add more water if needed to help the blending process.
TIp: I next put in the mesh strainer and pressed excess water out. This helps in the drying time.

Step 4: Mix in the Binder
Transfer the blended egg carton pulp to a mixing bowl and add glue. Start with small amounts of glue, gradually adding more until you reach a clay-like consistency that holds its shape.


Step 5: Knead and Sculpt
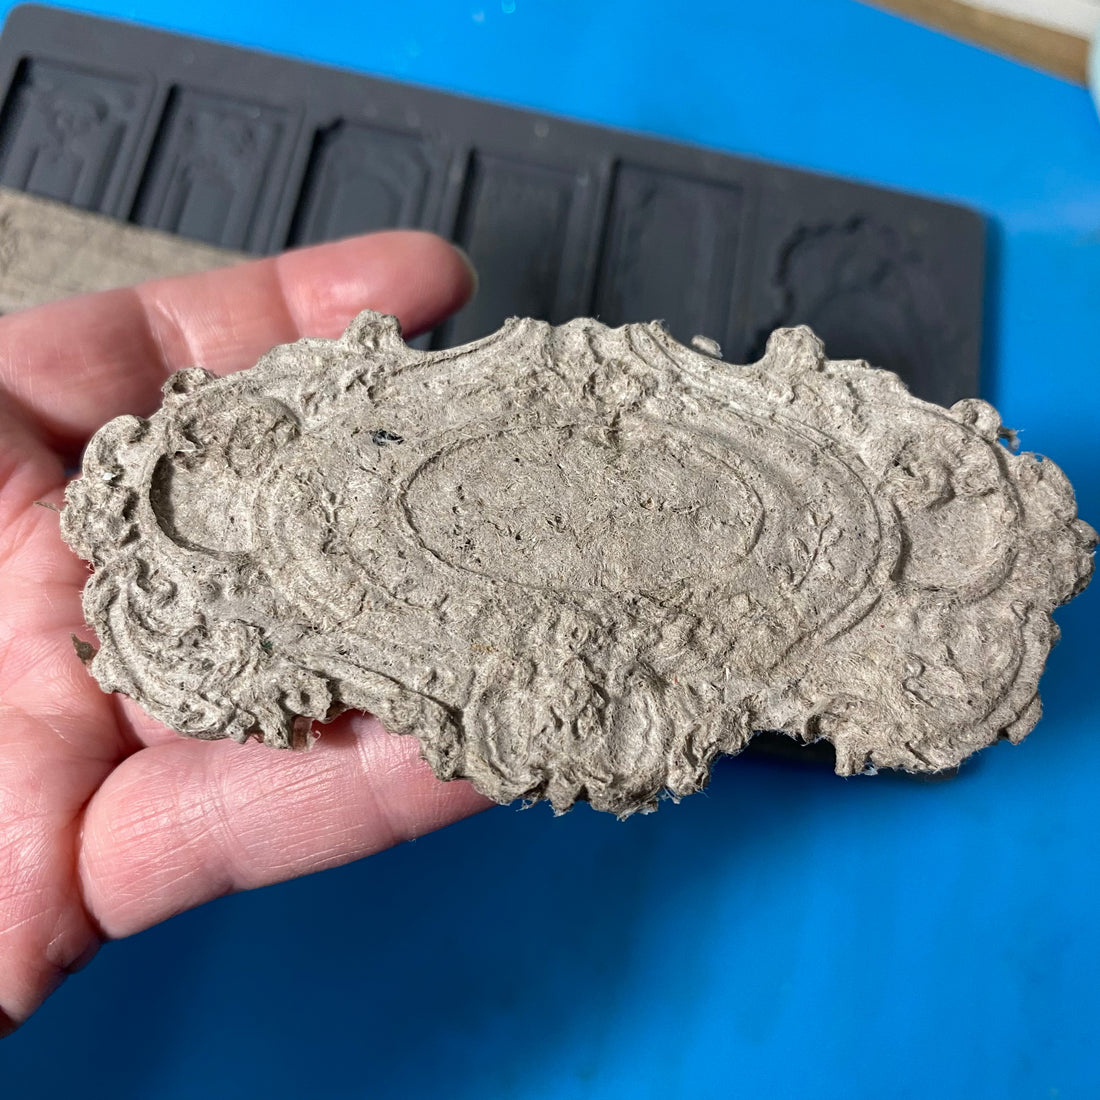
Once your paper clay mixture is ready, knead it like you would traditional clay. Then, you push into the decor moulds to create your castings.

Step 6: Let it Dry
Place your creations on a flat surface to dry. Depending on the size and thickness of your sculptures, drying times may vary. Be patient and allow sufficient time for your paper clay creations to dry completely.

Step 7: Optional: Decorate
Once your paper clay creations are dry, it's time to add some color and personality! Grab your acrylic paints and paintbrushes to decorate your sculptures however you like. Once the paint is dry, seal your creations with a clear sealant for added durability.
To see how I create with these castings make sure you give a follow! I have so many ideas to create and use in my upcoming projects. I will be sharing them over on my YouTube channel. I have been trying to record my process to add for you.
Shop for IOD Decor Moulds
Steel Roots Market on YouTube


